前言
上次安装完SQL SERVER 没想到JAVAEE课程又得要安装一个MYSQL 所以还是把MYSQL进行安装下吧
安装MYSQL
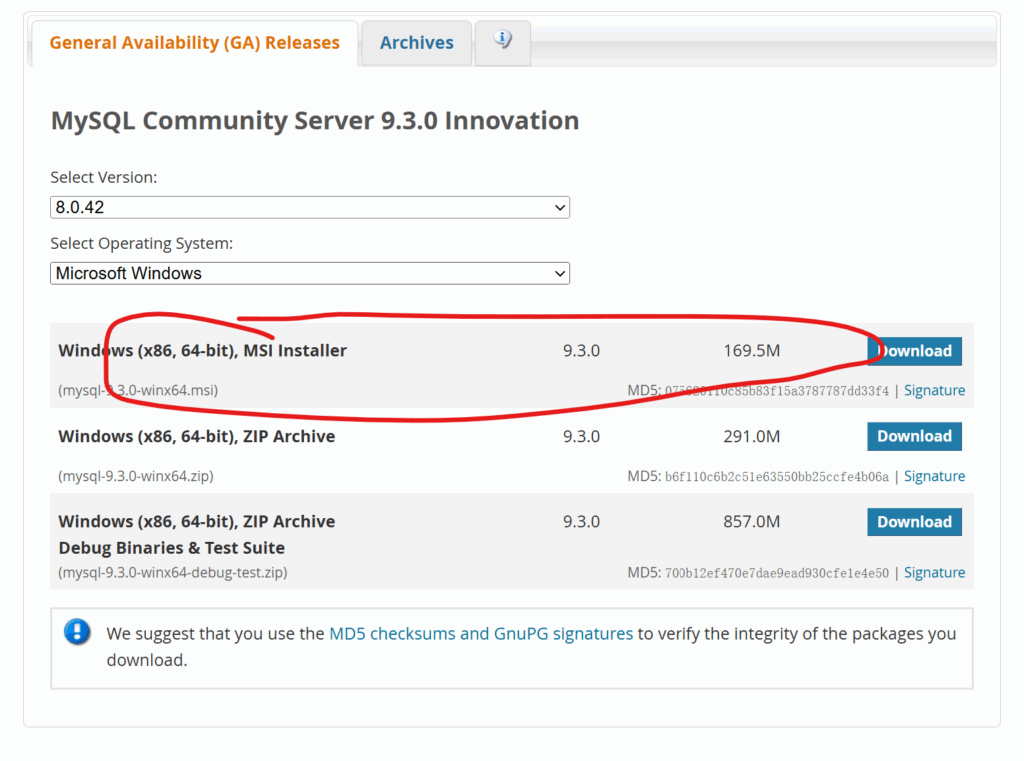
MYSQL的下载地址:https://dev.mysql.com/downloads/mysql/
打开网页之后最后选择一个版本的MYSQL数据库,记住系统选中MICROSOFT WINDOWS,然后一定要选择图中圈出来的MSI INSTALLER !!!!这个才是安装程序!!!
接下来在下面的链接中选择:NO thanks,just start my download 直接下载安装包

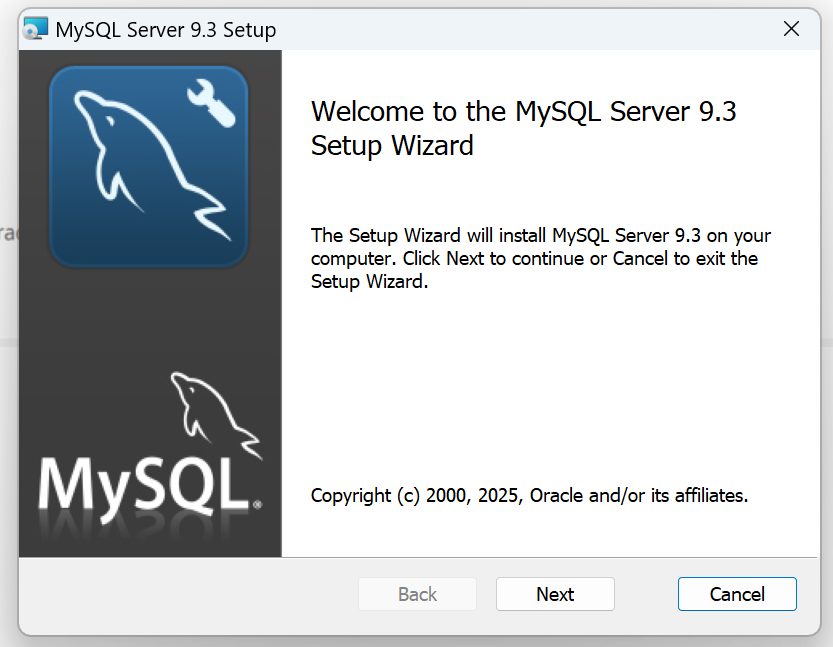
然后开始安装
安装MYSQL数据库
开始安装后会出现下面的界面
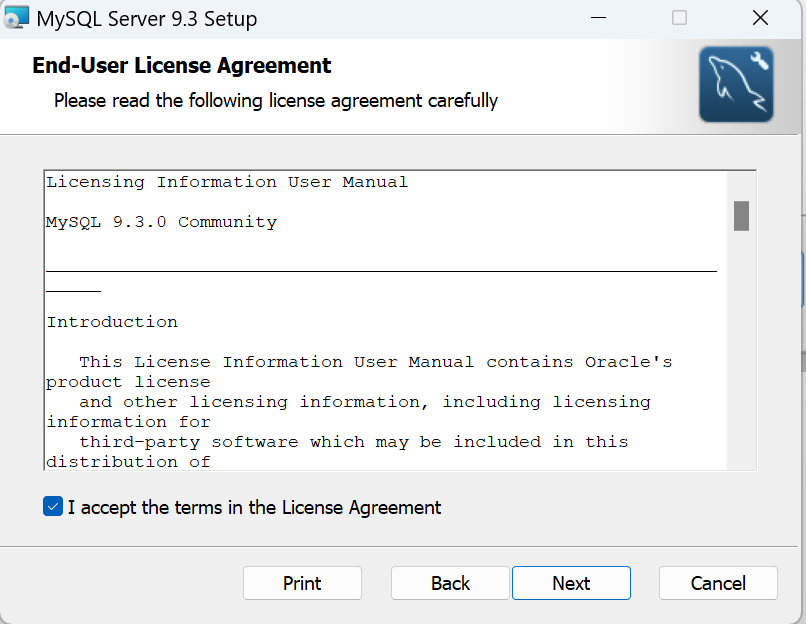
点击NEXT之后,点击同意用户许可协议
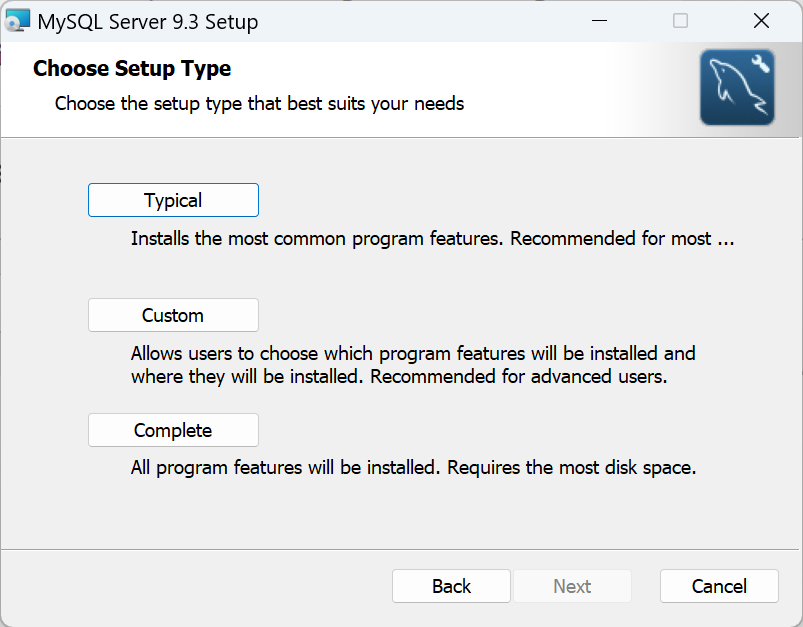
点击Typical进行典型安装
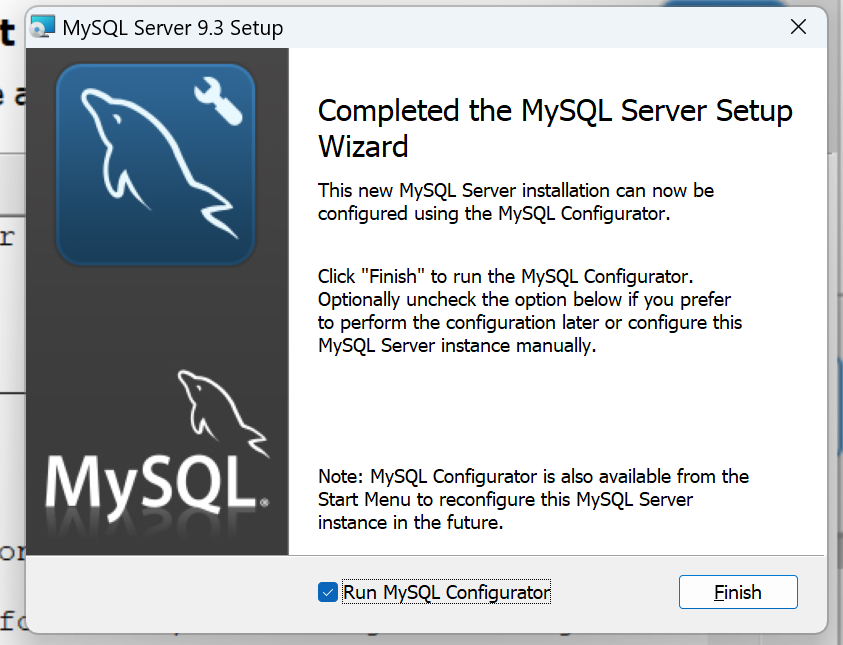
安装完成之后,点击FINISH(记得一定要勾选RUN Mysql COnfigurator)(当然如果忘记勾选了,也可在开始菜单中重新打开这个)
配置MYSQL
打开mysql配置器,界面如图
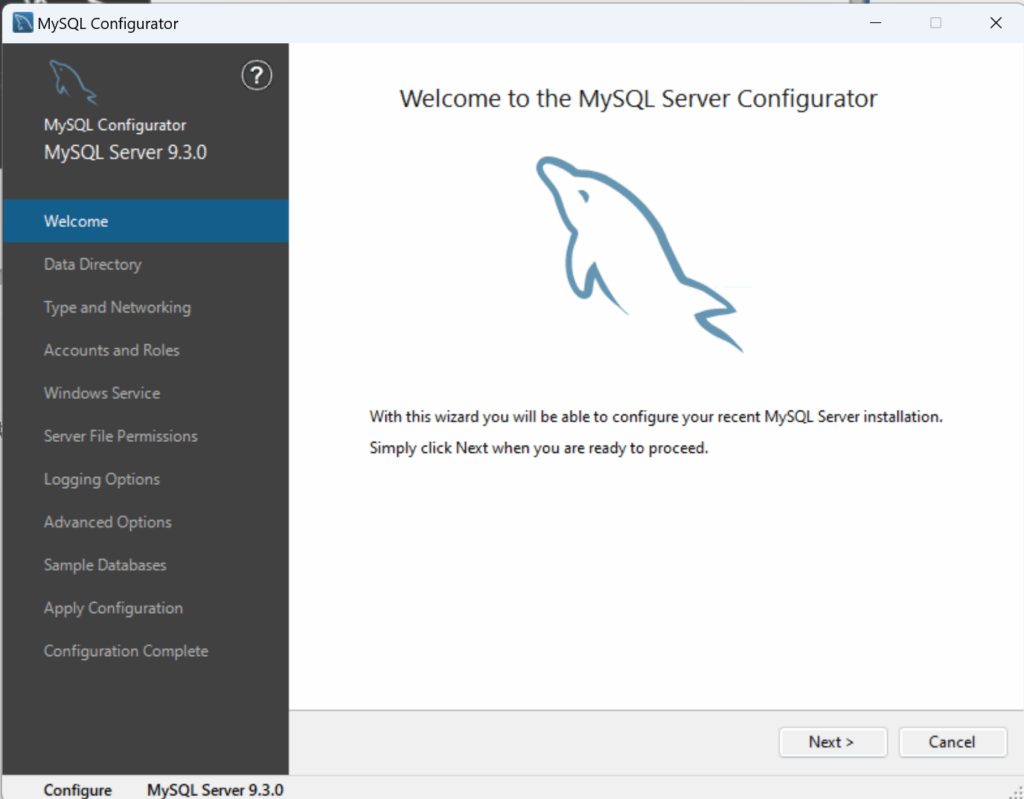
点击NEXT
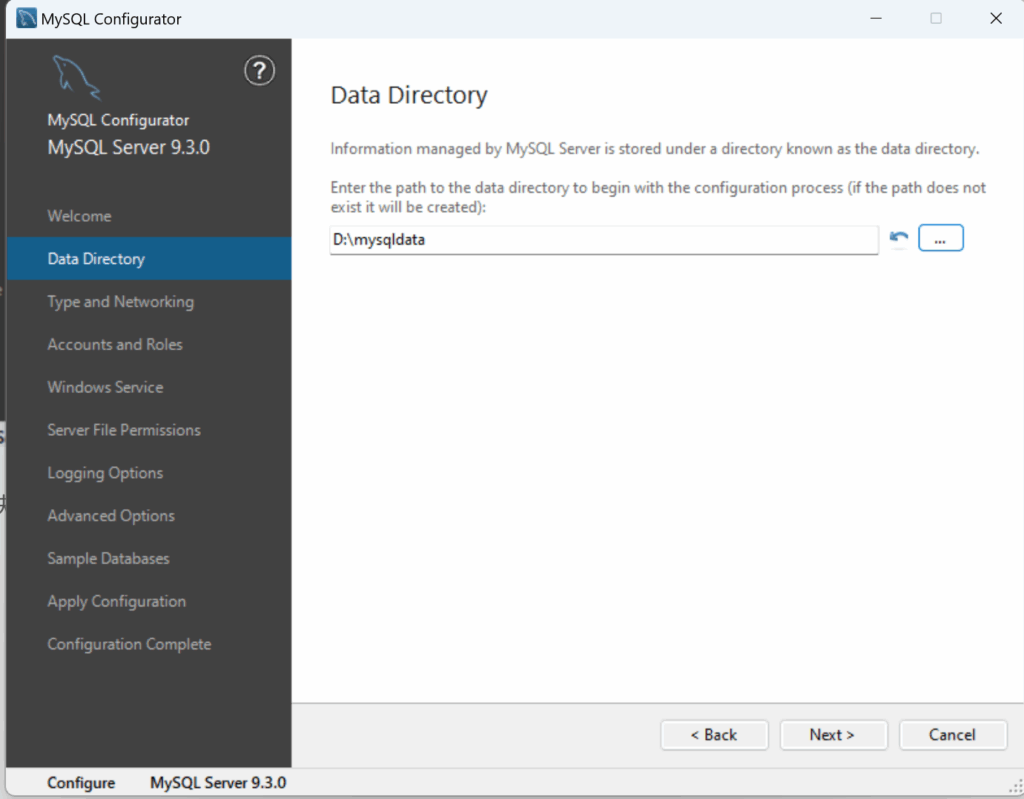
在DATA DIRECTORY中选中一个路径,以后吗mysql的数据库文件会放到这里。选定路径完之后点击next
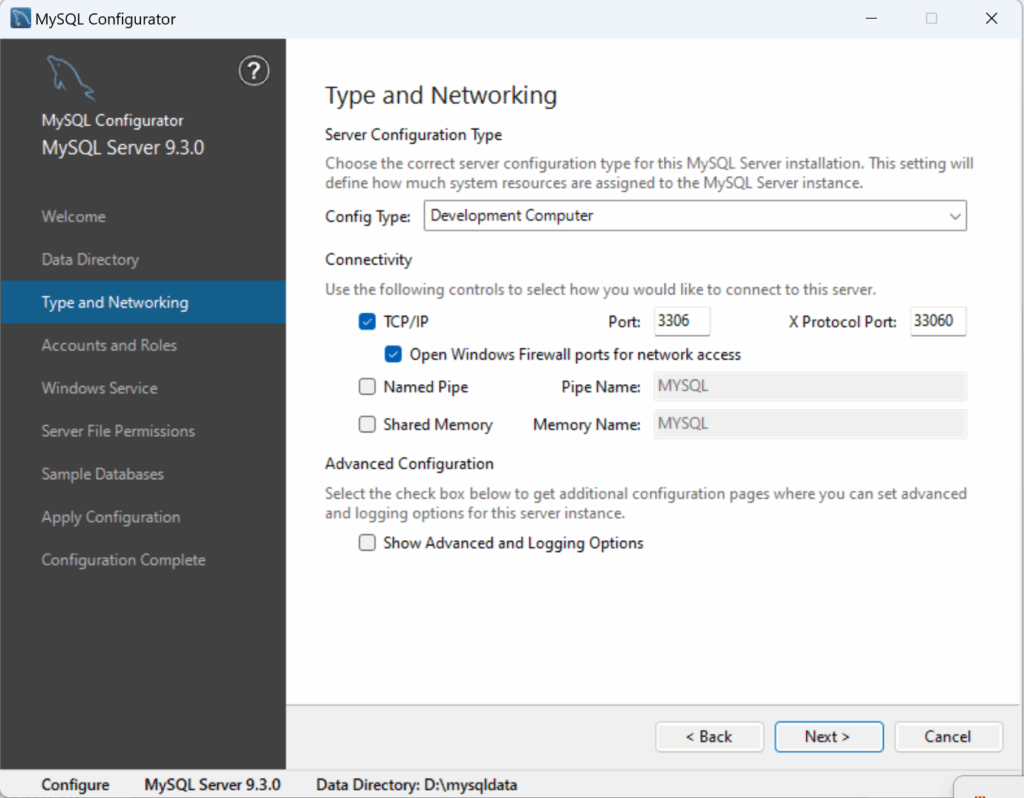
接下来是网络配置,按照默认就行了(MYSQL的配置器会自动帮你操作windows防火墙,所以我们不需要手动修改windows防火墙)

接下来上面让你输入数据库的root密码,请输入,以后这里就会是mysql的root账号的密码了
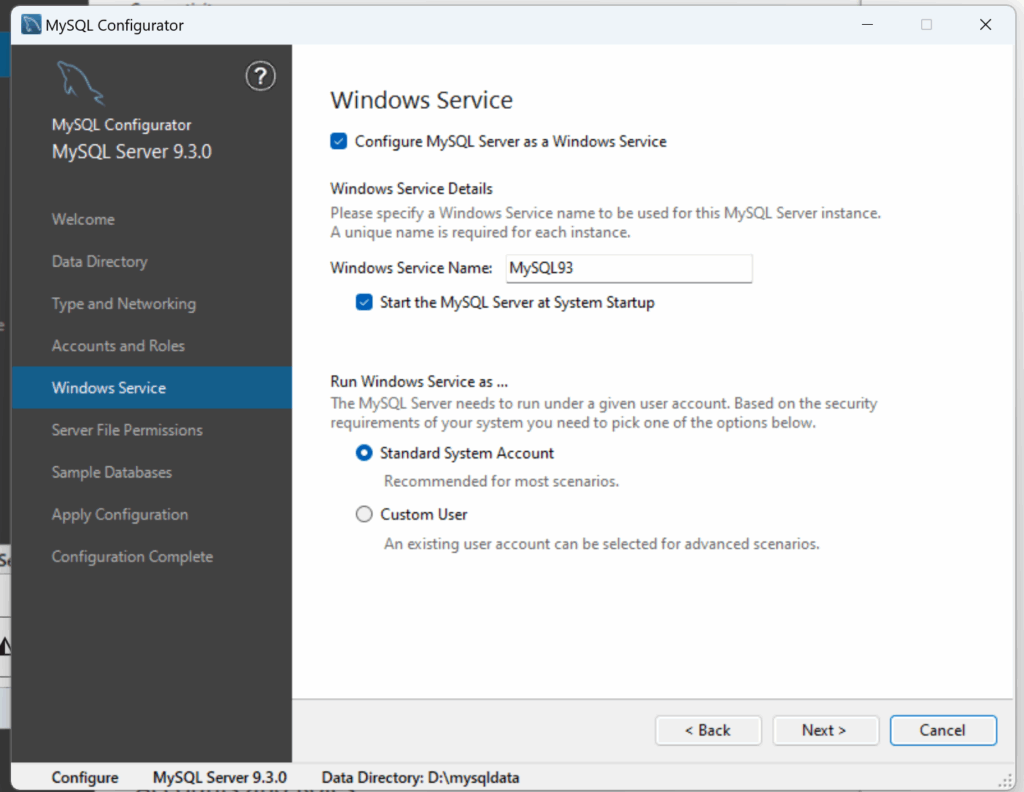
接下来配置下windows服务,这里直接保持默认设置就可以了
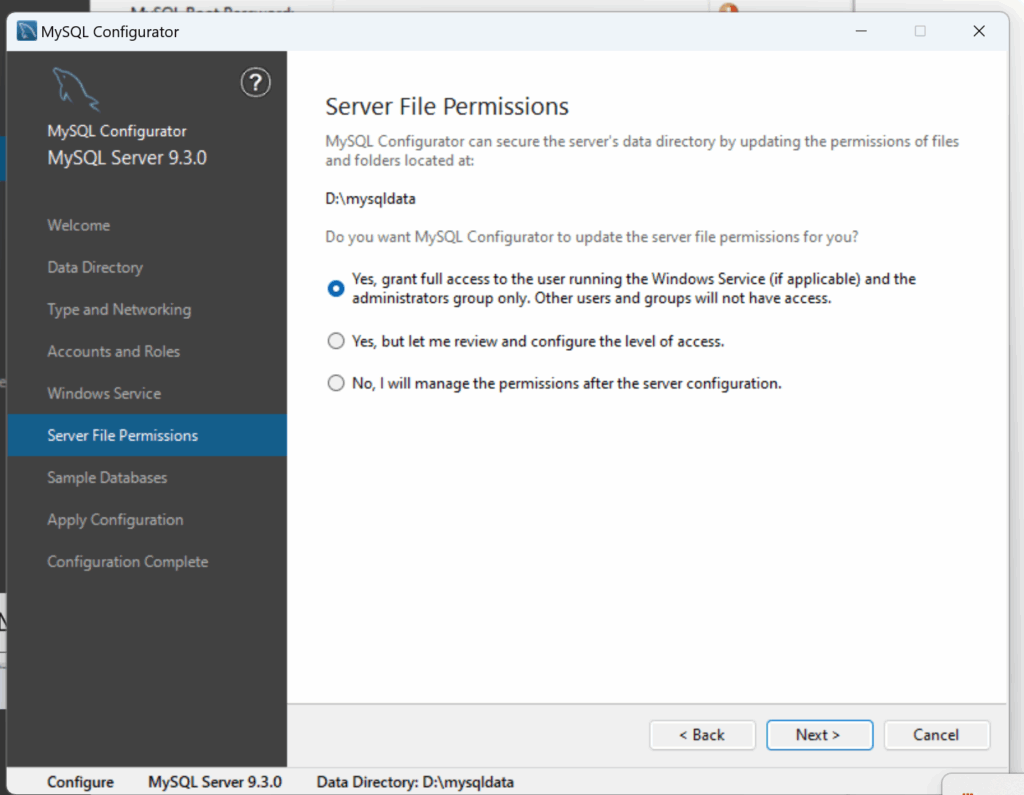
还有设置文件夹的许可,保持默认选项即可
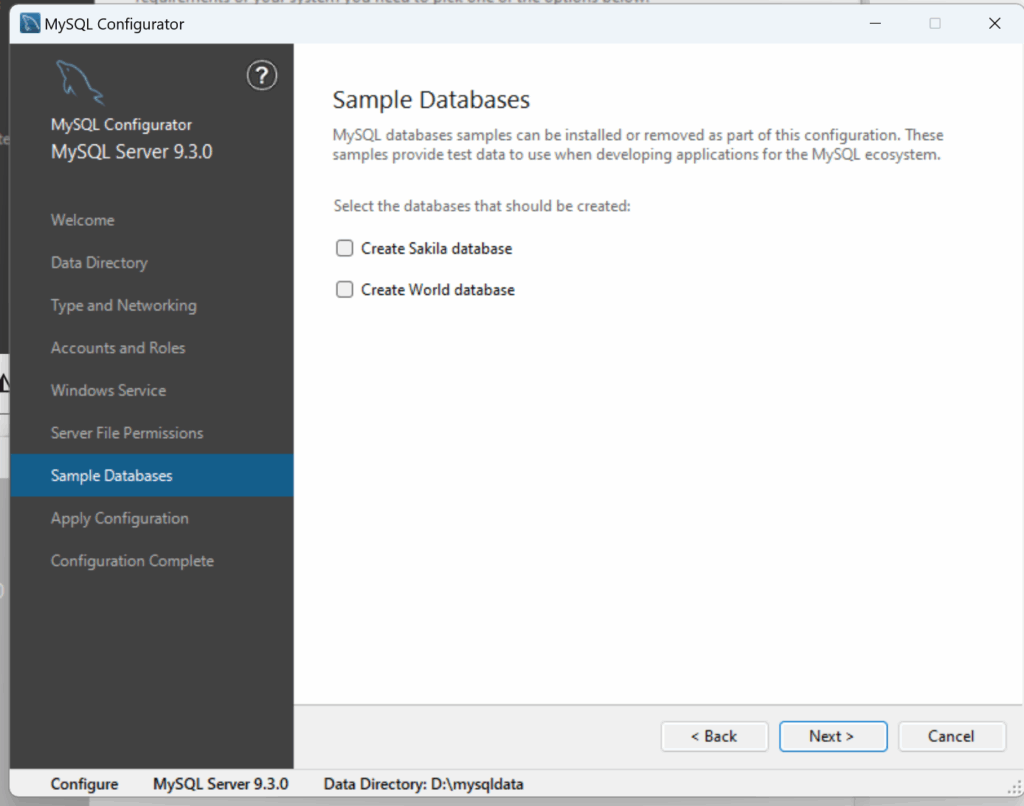
这里是问你要不要加一些默认的样例数据库,看你自己的选择,完成之后点击NEXT
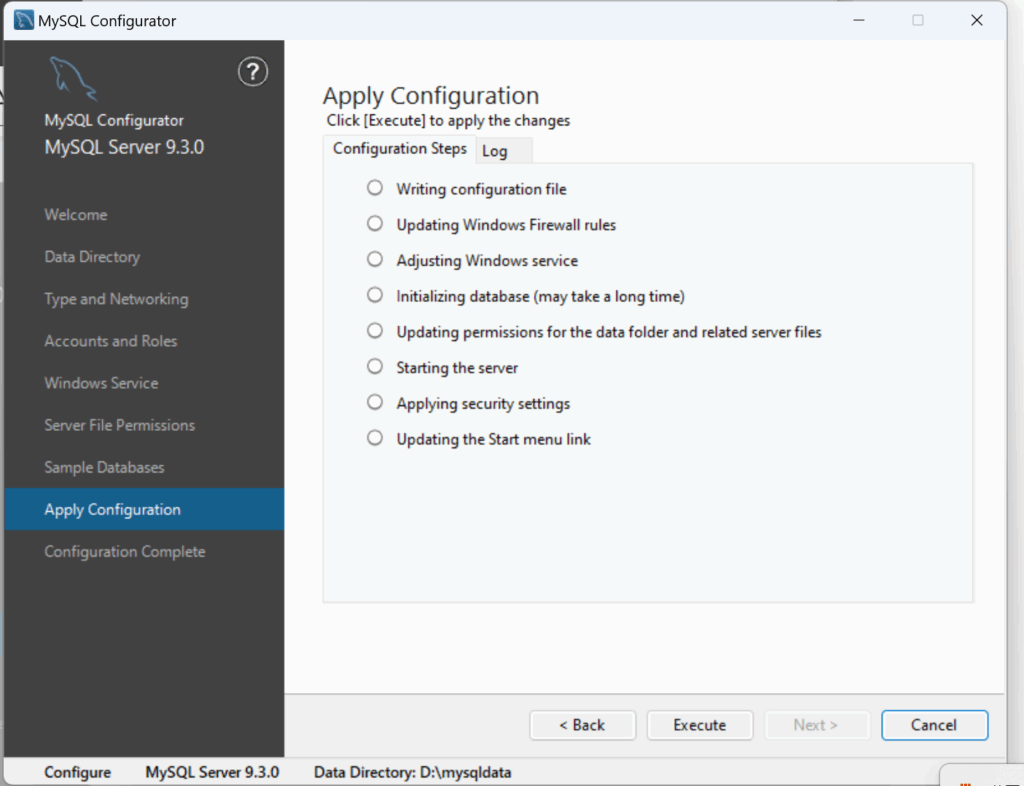
到了这个界面,点击Execute开始执行,执行完数据库就设置完成了
常见的问题
当你执行之后,有可能会发生下面的报错,在Initializing database阶段失败

日志信息如下:
Executing step: Writing configuration file

Saving my.ini configuration file...
Saved my.ini configuration file.
Completed execution of step: Writing configuration file

Executing step: Updating Windows Firewall rules

Attempting to delete a Windows Firewall rule with command: netsh.exe advfirewall firewall delete rule name="Port 3306" protocol=TCP localport=3306

已删除 1 规则。
确定。


Adding a Windows Firewall rule for MySQL93 on port 3306.
Attempting to add a Windows Firewall rule with command: netsh.exe advfirewall firewall add rule name="Port 3306" protocol=TCP localport=3306 dir=in action=allow
确定。


Successfully added the Windows Firewall rule.
Attempting to delete a Windows Firewall rule with command: netsh.exe advfirewall firewall delete rule name="Port 33060" protocol=TCP localport=33060

已删除 1 规则。
确定。


Adding a Windows Firewall rule for MySQL93 on port 33060.
Attempting to add a Windows Firewall rule with command: netsh.exe advfirewall firewall add rule name="Port 33060" protocol=TCP localport=33060 dir=in action=allow
确定。


Successfully added the Windows Firewall rule.
Completed execution of step: Updating Windows Firewall rules

Executing step: Adjusting Windows service

Attempting to grant the required filesystem permissions to the 'NT AUTHORITY\NetworkService' account.
Granted permissions to the data directory.
Granted permissions to the install directory.
Updating existing service...
Existing service updated
Completed execution of step: Adjusting Windows service

Executing step: Initializing database (may take a long time)

Attempting to run MySQL Server with --initialize-insecure option...
Starting process for MySQL Server 9.3.0...
Starting process with command: C:\Program Files\MySQL\MySQL Server 9.3\bin\mysqld.exe --defaults-file="D:\mysqldata\my.ini" --console --initialize-insecure=on --lower-case-table-names=1...
MySQL Server Initialization - start.
C:\Program Files\MySQL\MySQL Server 9.3\bin\mysqld.exe (mysqld 9.3.0) initializing of server in progress as process 14344
mysqld: File '.\閼斥€崇毈濡?bin.index' not found (OS errno 2 - No such file or directory)
The newly created data directory D:\mysqldata\Data\ by --initialize is unusable. You can remove it.
Aborting
MySQL Server Initialization - end.
Process for mysqld, with ID 14344, was run successfully and exited with code 1.
Failed to start process for MySQL Server 9.3.0.
Database initialization failed.
Completed execution of step: Initializing database (may take a long time)
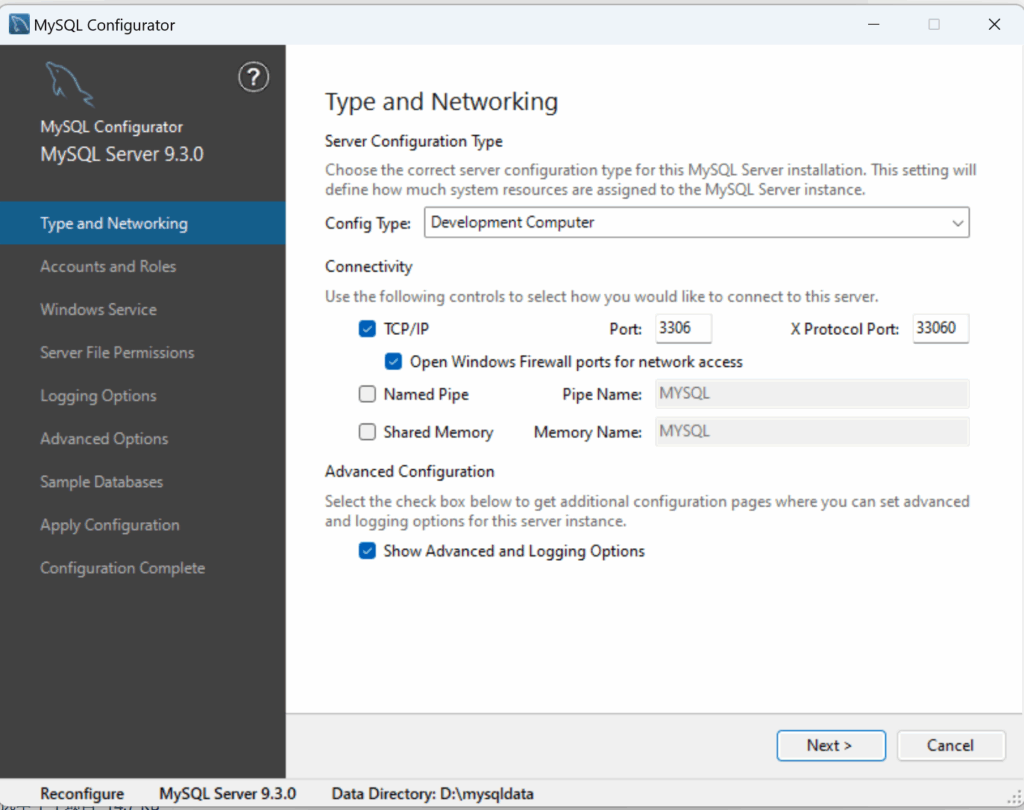
这个报错大概率的原因是因为电脑的用户名是中文的(即系统用户名),这个时候请在界面上点击上一步,找到Type and Networking ,在下面的界面中勾选Show Advanced and Logging Options
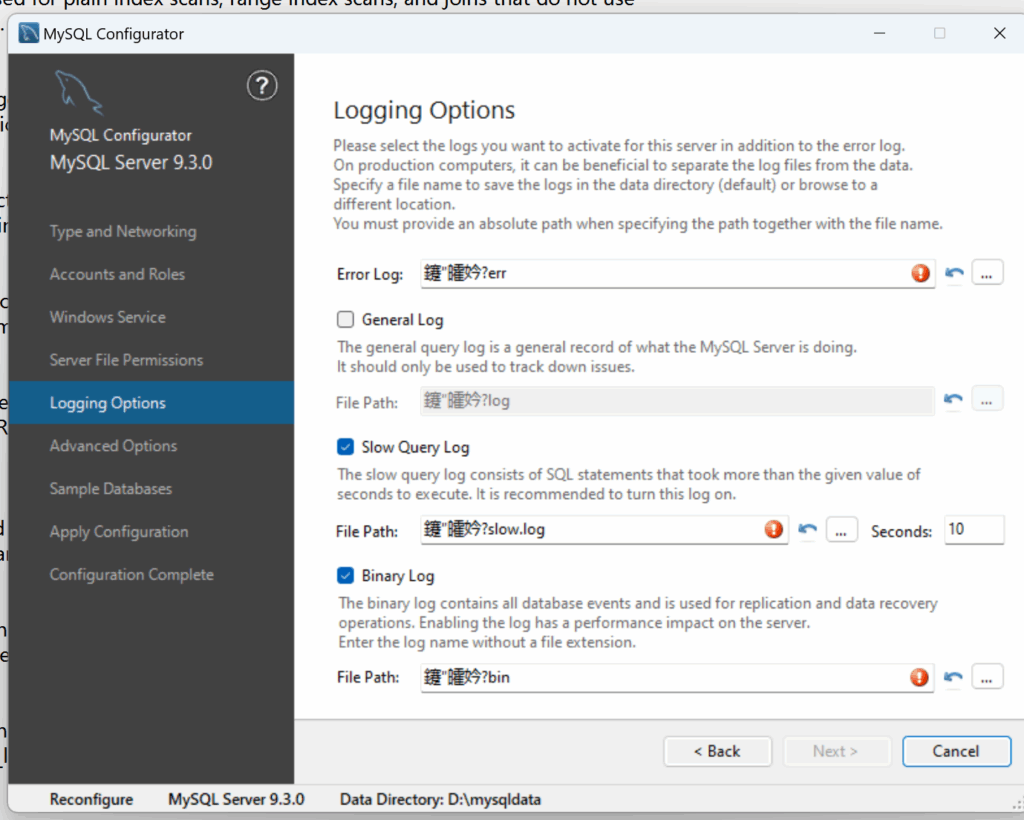
接下来下一步,这里会多一个阶段,叫做logging Options,可以看到如下图,有很多的乱码,请将乱码删去,替换为英文字符(比如error log为q2019err)
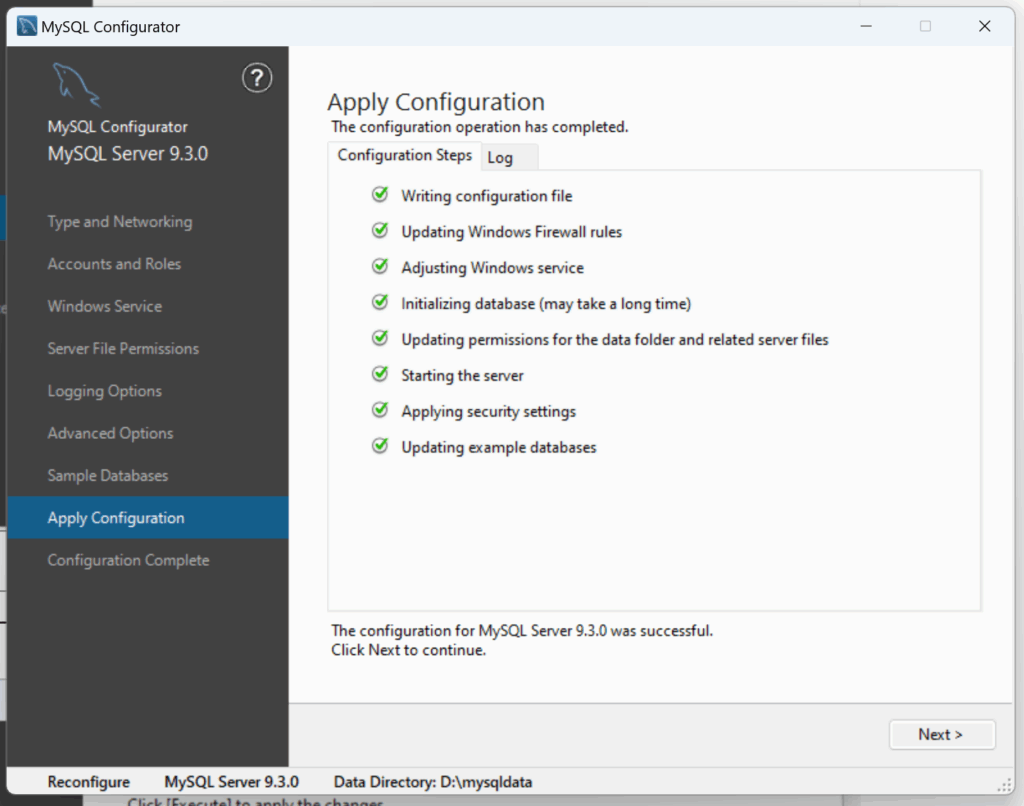
然后再到最后一步,点击Excute执行,成功界面如下图
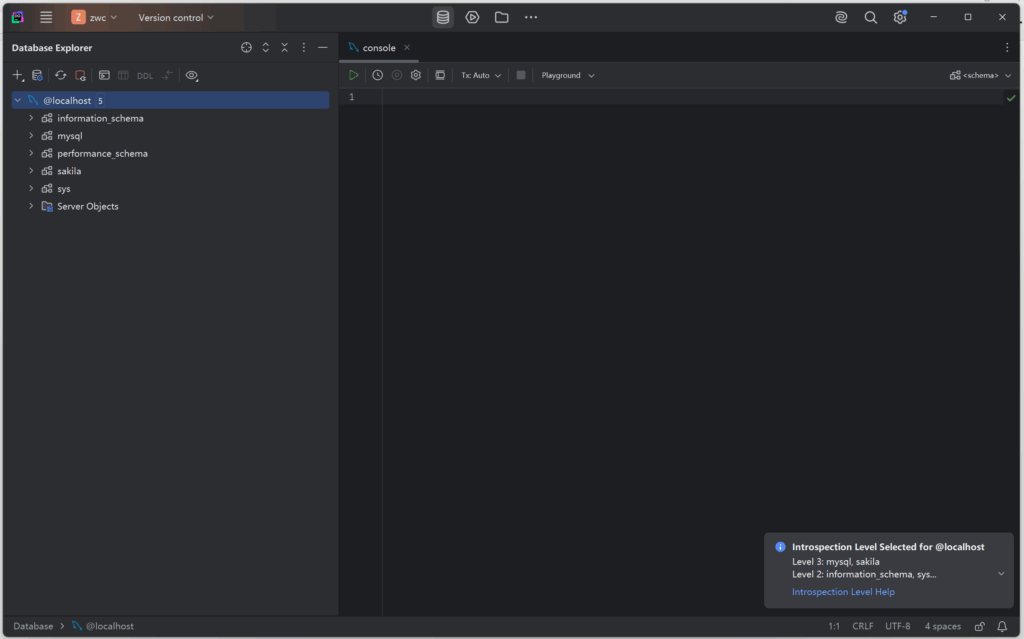
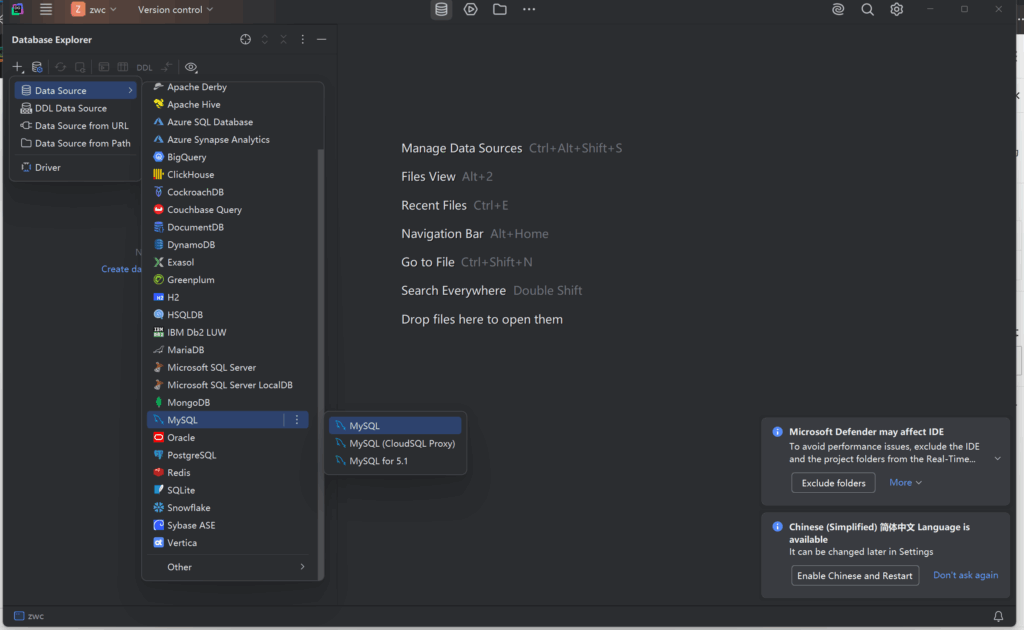
DATAGRIP连接
安装之后,我们再用datagrip进行连接,在新建的项目中点击左上角的加号,然后点击data source 选中Mysql
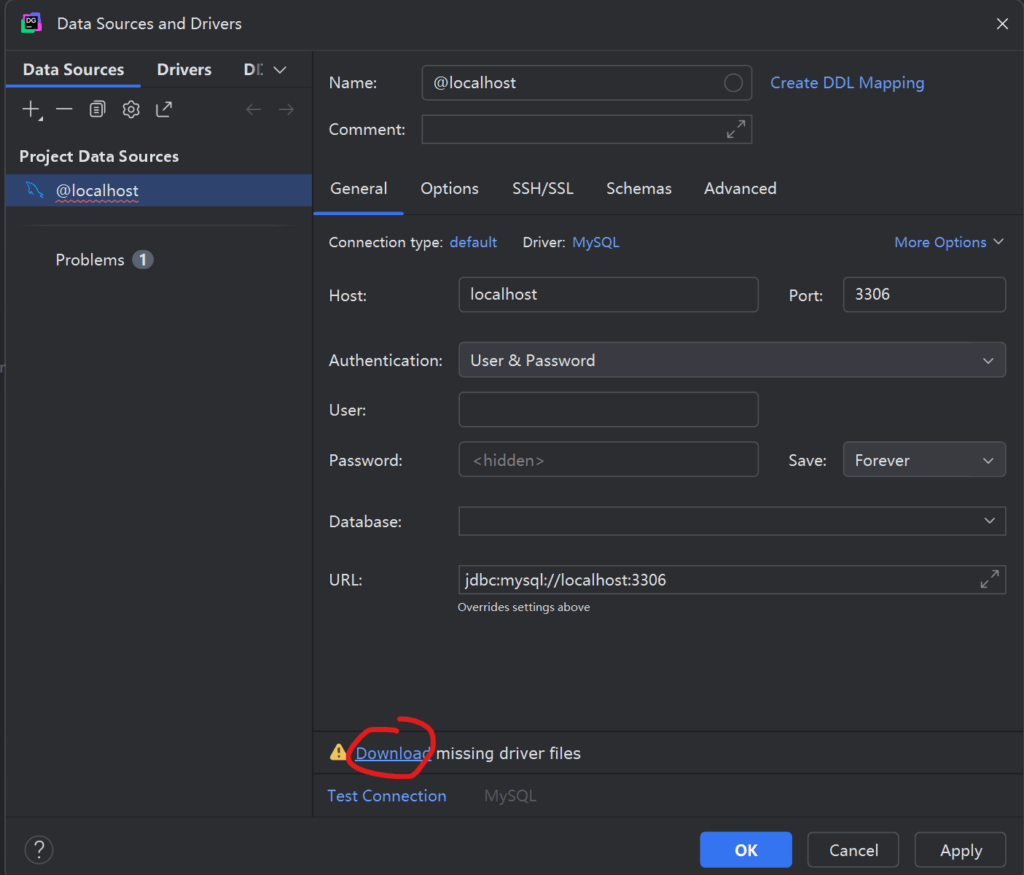
在弹出的窗口中,点击下图中圈出的Download,这样子来安装下数据库驱动
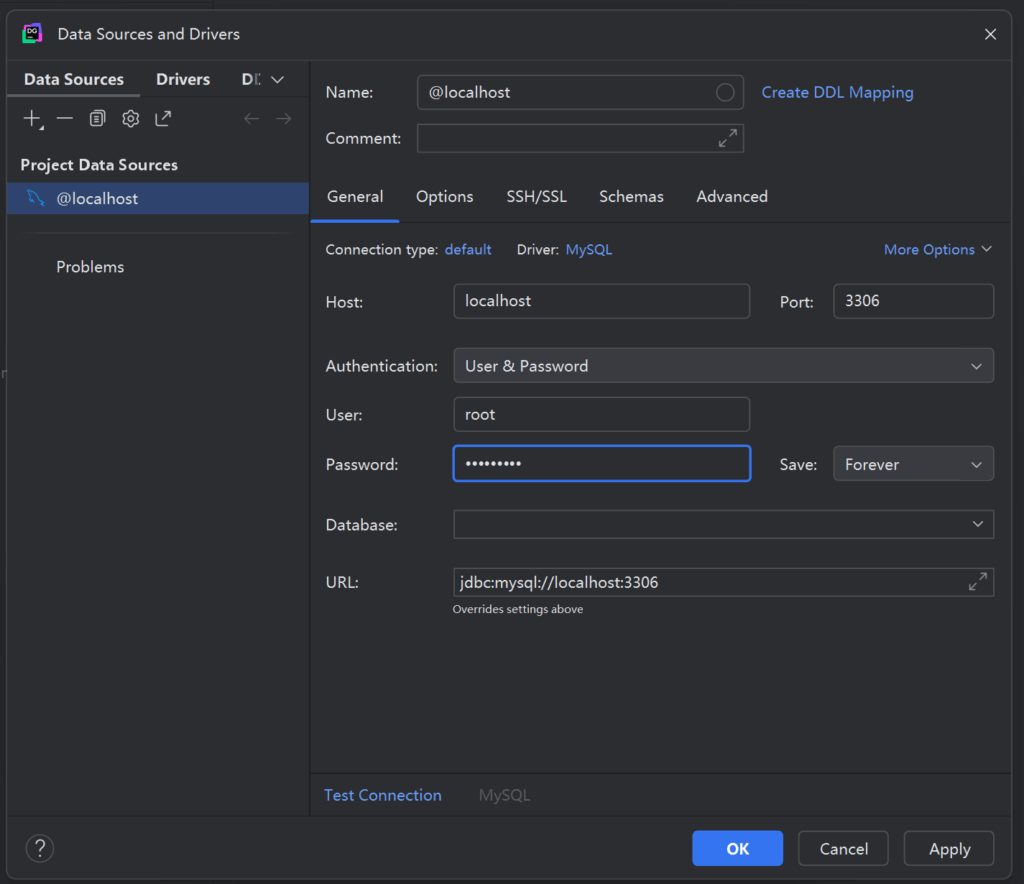
安装完后如下图,接下来User填写root,密码填下你刚刚设置的密码,然后点击OK开始连接
连接成功,如下图: